Settings
Global settings
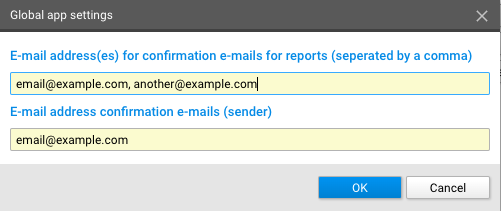
The global settings contain the following:
- Receivers of confirmation e-mails
- Sender of confirmation email
Any e-mail addresses entered in the first field, will receive a confirmation e-mail saying an report has been succesfully processed and sent.
The second field is the e-mail address it was sent from.
Be sure to change the default email addresses.
Manage accounts
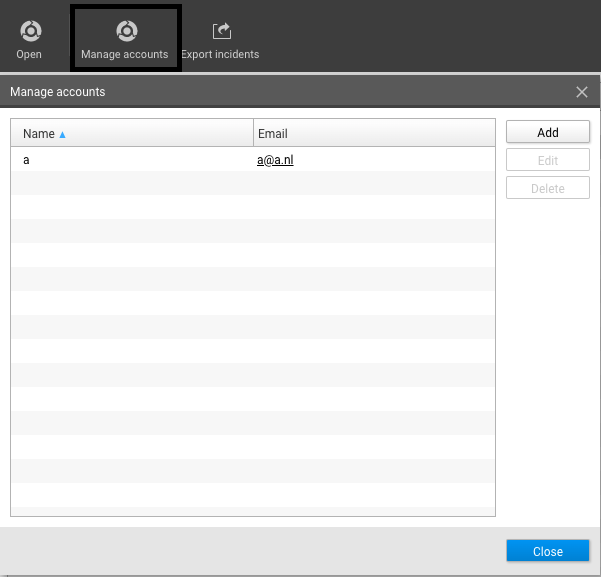
This tab shows a complete list of every user/e-mail that has access to the WMCA.
You can Add, Edit, and Delete users on this list.
Add/Edit a user
Click on Add/Edit on the Manage Accounts tab. This will bring up a new screen:
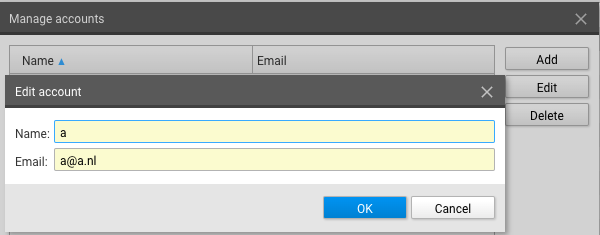
Note: To edit a user, you must first select it by clicking on it in the list
Name: Name of the user
Email: E-mail address of the user
To save your changes, click on Ok.
Delete a user
Select a user in the list by clicking it once, then click on Delete.
It will prompt you with a Warning asking whether you are sure you want to delete the user or not.
Note: If a user is deleted, you can not recover it unless you Add it back manually.
Export reports
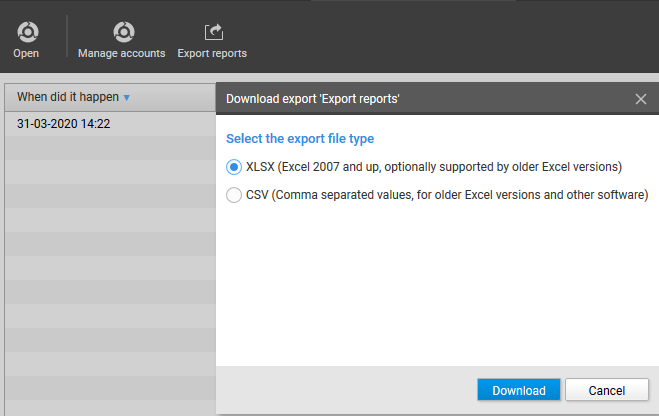
To Export the complete list of all reports, Go to Export reports, select your desired File type and click on Download.
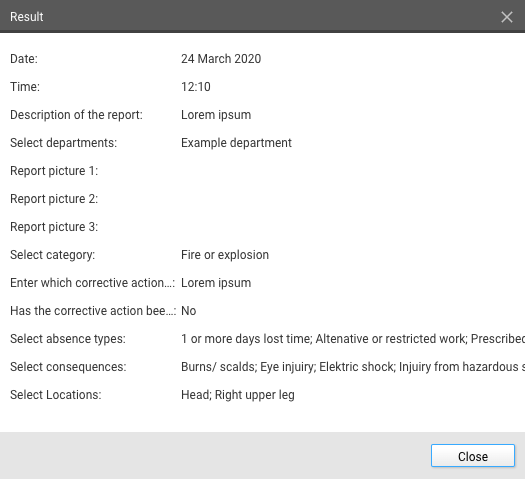
View a report
To view an report, go to the overview and click on any report you'd like to view and click on Open.
Note: You can also double-click the report to view it.
Note: You can shrink/enlarge this screen for a better overview. Move your cursor to the edges, it will then change into an arrow. Click the mouse and drag to either shrink or enlarge the screen.
Popup-notifications
Example of a popup:
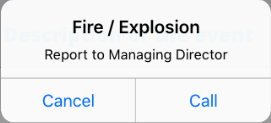
Notifications are managed per form. To edit a notification, you will need to go to the form inside the publisher. Right-click on the form and click on Properties. Click on the tab WMCA Form. Here you can setup the notification for a form. The form needs to be marked as Is urgent.
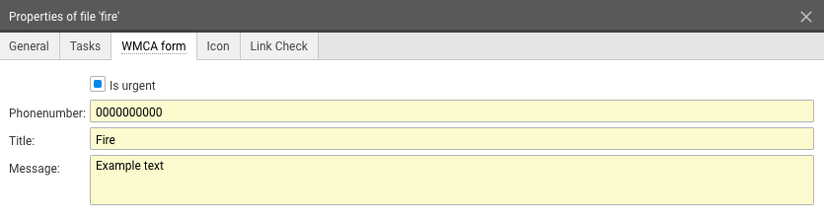
Phone: The phone number which is called when Call is pressed
Title: Title of the notification
Message: Contents/message of the notification
To save your changes, click on Ok.
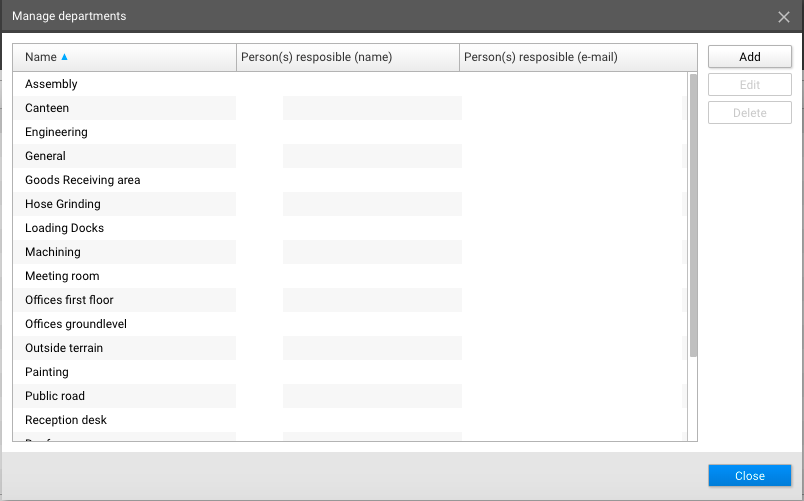
Departments
To manage all departments, go to Menu -> Form lists -> Departments (as shown below).

This will launch a screen listing all the departments that can be chosen when reporting an incident in the WMCA
Add/Edit a department
Note: To Edit a department, you must first select one from the list.
Click on Add/Edit, it will launch the following screen:
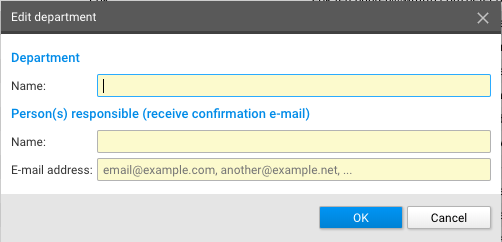
Name: Name of the department
Name (2): People responsible for the department
E-mail address: The e-mail addresses who will receive a confirmation when an incident has been reported linked to this department
To save your changes, click on Ok.
Delete a department
Select a department in the list by clicking it once, then click on Delete.
It will prompt you with a Warning asking whether you are sure you want to delete the department or not.
Note: If a department is deleted, you can not recover it unless you Add it back manually.